

The Collatz Conjecture is a mathematical idea that many people believe to be true, but it remains unproven. It is named after German mathematician Lothar Collatz, who first proposed it in 1937. The conjecture is also known as the “3n + 1” sequence because it is generated by following two simple rules:
The Collatz Conjecture states that regardless of the starting number, the sequence will always reach the number 1. This has been verified for all numbers below 268 using computer calculations. However, despite extensive testing, the conjecture remains unproven, and its status as a conjecture continues to intrigue mathematicians worldwide.
The Collatz sequence starts with any positive integer and follows the two rules mentioned above. For example, starting with the number 10, the sequence would be:
10 –> 5 –> 8 –> 4 –> 2 –> 1
This sequence is simple yet elusive, as it has properties that are still not fully understood.
The Collatz Conjecture is significant because it is a simple problem that has stumped some of the world’s greatest mathematicians for decades. Despite the progress made in understanding the conjecture, it remains one of the most famous unsolved problems in mathematics.
Mathematicians have tried various approaches to solve the Collatz Conjecture, including:
However, none of these approaches have been successful in proving the Collatz Conjecture. The conjecture remains a mystery, and its resolution continues to be a goal for many mathematicians.
<!DOCTYPE html>
<html>
<head>
  <title>Collatz Conjecture</title>
  <script type="text/javascript" src="https://www.gstatic.com/charts/loader.js"></script>
  <style>
    body {
      font-family: Arial, sans-serif;
    }
    #output {
      padding: 10px;
      border: 1px solid #ddd;
      background-color: #f8f8f8;
      font-size: 16px;
    }
    #chart {
      width: 100%;
      height: 500px;
    }
  </style>
</head>
<body>
  <h1>Collatz Conjecture</h1>
  <div id="output"></div>
  <div id="chart"></div>
  <script>
    google.charts.load('current', {'packages':['corechart']});

    function collatz(n) {
      let sequence = [n];
      while (n !== 1) {
        if (n % 2 === 0) {
          n = n / 2;
        } else {
          n = 3 * n + 1;
        }
        sequence.push(n);
      }
      return sequence;
    }

    function generateRandomCollatzAndChart() {
      let n = Math.floor(Math.random() * 100000) + 100;
      let sequence = collatz(n);
      let output = document.getElementById("output");
      output.innerHTML = "Starting number: " + n + "<br>" + sequence.join(", ");

      let data = new google.visualization.DataTable();
      data.addColumn('number', 'Step');
      data.addColumn('number', 'Value');
      for (let i = 0; i < sequence.length; i++) {
        data.addRow([i, sequence[i]]);
      }

      let options = {
        title: 'Collatz Sequence | Start Number: '+n+' | Steps: '+(sequence.length-1),
        curveType: 'function',
        legend: { position: 'bottom' }
      };

      let chart = new google.visualization.LineChart(document.getElementById('chart'));
      chart.draw(data, options);

      // Simulate the sleep function to generate the next sequence after 3 seconds
      setTimeout(generateRandomCollatzAndChart, 3000);
    }

    google.charts.setOnLoadCallback(generateRandomCollatzAndChart);
  </script>
</body>
</html>

GitHub has emerged as a pivotal platform in the world of software development, providing a robust ecosystem for version control and collaboration. In this article, we delve into the intricate details of GitHub repository hosting, elucidating how developers can create, host, and manage Git repositories effortlessly while emphasizing the collaborative tools that GitHub offers.
GitHub simplifies the process of creating and hosting Git repositories, making it accessible for developers of all skill levels. To start, developers can initiate a new repository directly on the GitHub website or utilize the Git command line to push an existing repository. This process involves defining repository details such as name, description, and visibility (public or private).
Once a repository is created, developers can use Git commands to commit changes and push them to the GitHub repository. This integration ensures that the entire team can access the latest codebase, fostering a collaborative and efficient development environment. GitHub’s reliability and scalability make it an ideal choice for hosting repositories, ensuring seamless code collaboration.
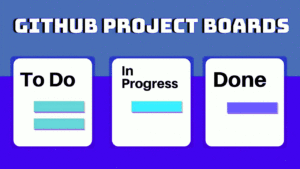
GitHub goes beyond being a simple hosting platform; it offers a suite of tools for effective project management. These tools enhance collaboration, streamline workflows, and contribute to the overall efficiency of development teams.
GitHub’s collaboration features foster a culture of teamwork and transparency among developers. By centralizing communication, tracking issues, and streamlining code reviews, GitHub ensures that the entire team remains on the same page throughout the development lifecycle. Moreover, the platform’s accessibility encourages open-source collaboration, enabling developers worldwide to contribute to diverse projects.
GitHub has evolved into a powerhouse for software development, offering not only reliable repository hosting but also a rich set of tools for collaboration and project management. Developers can create, host, and manage Git repositories effortlessly, while GitHub’s collaborative features enhance communication and streamline workflows.
As the software development landscape continues to evolve, GitHub remains a cornerstone in the quest for efficient, collaborative, and high-quality code development.
Git is a distributed version control system (DVCS) that helps developers manage and track changes in their source code during software development. It allows multiple people to collaborate on a project simultaneously while keeping a complete history of all changes made to the codebase. Git is known for its speed, data integrity, and flexibility.
Git was created by Linus Torvalds, the same individual who created the Linux operating system.
Git is crucial in software development for several reasons:
GitHub is a web-based platform built on top of Git, designed to make collaborative software development easier. It provides:
GitHub has become a central hub for open-source projects and a valuable resource for developers and organizations to share, collaborate on, and distribute their code.
In summary, Git is a version control system that helps developers manage code changes efficiently, and GitHub is a web-based platform that enhances the collaborative aspect of Git, making it easier for developers to work together on projects. Both Git and GitHub have had a profound impact on the world of software development.
In today’s digital age, we rely heavily on websites for various purposes, from shopping and communication to accessing information and entertainment. These websites are hosted on servers that handle the vast amount of internet traffic generated every day. Linux servers, with their robustness, scalability, and security, have emerged as a dominant force in supporting a majority of the internet traffic.
Linux, an open-source operating system, has become the preferred choice for web hosting due to its stability, flexibility, and cost-effectiveness. Its ability to efficiently manage high volumes of requests, handle concurrent connections, and optimize resource utilization makes it an ideal platform for hosting websites. Linux also provides a wide range of server software, such as Apache and Nginx, which are well-known for their performance and reliability.
The evolution of web development in Linux systems has witnessed significant advancements. Initially, web development relied on Common Gateway Interface (CGI) technology, which allowed web servers to execute scripts to generate dynamic content. In the early days, scripting languages like PERL were commonly used in Linux environments for CGI programming.
Later on, the LAMP stack (Linux, Apache, MySQL, and PHP/Python/Perl) gained prominence as a powerful and popular web development environment. Linux served as the operating system, Apache as the web server, MySQL as the database management system, and PHP/Python/Perl as the scripting language. LAMP provided a comprehensive solution for developing dynamic websites and web applications, and it became the foundation for many successful web projects.
As technology progressed, new concepts and tools emerged in the web development landscape, including serverless architecture and frameworks like Node.js. Serverless computing abstracts away the infrastructure management, allowing developers to focus solely on writing code. It enables automatic scaling, reduced costs, and simplifies the deployment process. While Linux servers continue to play a crucial role in hosting serverless applications, the architecture itself provides a more efficient and scalable approach to building web services.
Node.js, a JavaScript runtime built on Chrome’s V8 engine, has gained immense popularity for developing server-side applications. With Node.js, developers can use JavaScript on both the client and server sides, enabling a unified and streamlined development process. Its non-blocking and event-driven architecture make it highly efficient, especially for handling concurrent connections and real-time applications.
The integration of Node.js with Linux systems has further expanded the possibilities in web development. Linux’s compatibility with Node.js allows developers to leverage its powerful features, such as the vast collection of open-source modules available through the Node Package Manager (npm). This combination has facilitated the creation of scalable, high-performance web applications and APIs.
As a matter of fact, Linux servers have emerged as the backbone of the internet, supporting the majority of web traffic. The evolution of web development in Linux systems has witnessed the transition from CGI and PERL to the LAMP stack and, more recently, the emergence of serverless architecture and tools like Node.js. As technology continues to evolve, Linux remains a reliable and versatile platform for hosting websites, while new concepts and tools provide developers with more efficient and innovative ways to build web applications.
The National Informatics Centre (NIC) is a premier information technology organization of the Indian Government that provides e-governance solutions and support to various government departments and agencies. The organization was established in 1976 and has since played a crucial role in the development and implementation of various government programs and initiatives.
NIC supports the development of government websites, including those related to health programs, by providing technical expertise, infrastructure, and software applications. NIC provides various services such as website design, web hosting, content management system (CMS) development, and data center services to government departments and agencies.
NIC also provides support for the implementation of e-governance initiatives such as the National Health Stack, which aims to create a shared digital infrastructure for healthcare service delivery across the country. The National Health Stack includes various components such as the National Health ID, Health Data Management Policy, Federated Personal Health Records (PHR) system, and Health Analytics Platform, which aim to create a comprehensive health information system that can be used to improve healthcare service delivery and outcomes.
In summary, the National Informatics Centre plays a crucial role in supporting the development and implementation of government websites, including those related to health programs, by providing technical expertise and infrastructure support. The organization’s contribution is critical to the success of various e-governance initiatives, including the National Health Stack, which aims to improve the delivery of healthcare services in India.
Linux desktop environments come with their own set of commands and configurations to provide you with various ways to customize and manage your desktop environment. Whether it’s adjusting appearance, managing power settings, or tweaking system behaviors, these tools offer flexibility and control for a smoother experience.
Below is a list of 25 important Xfce command-line tools and configurations along with explanations of when to use them and why:
These commands and configurations expand your control over the Xfce desktop environment, giving you the ability to tailor it to your preferences and workflow.
CLI stands for Command Line Interface, which is a way of interacting with a computer program or operating system through a text-based interface rather than a graphical user interface (GUI). A CLI allows users to enter commands into a command prompt or terminal window to perform tasks such as navigating the file system, running programs, and configuring system settings.

Bash, Terminal, Command Prompt, and Power Shell are all examples of command-line interfaces used in different operating systems.
Bash (Bourne-Again SHell) is a popular shell program that is commonly used on Linux and other Unix-based operating systems. It provides a command-line interface for executing commands, running scripts, and manipulating files and directories. Some useful features of Bash are:
Bash is a powerful and flexible command-line interface and scripting language, but its complexity and limitations may make it challenging for some users. Some of these challenges are:
Terminal is a command-line interface that is used on Apple’s macOS operating system. It provides a window where users can enter commands and interact with the operating system. In many Linux distros CLI application has the name ‘Terminal’. While the names of the terminal applications may be the same on Linux and MacOS, there are differences in the way they function as underlying operating systems are not same. Linux terminal is usually Bash, while the default shell used in the macOS terminal is Zsh. Many of the command-line tools and utilities available in the Linux terminal are also available in the macOS terminal, there may be some differences in the versions or implementations of these tools
Command Prompt is a command-line interface that is used on Microsoft Windows operating systems. It provides a window where users can enter commands to perform tasks such as navigating the file system, running programs, and configuring system settings.
Power Shell is also a command-line interface developed by Microsoft for modern Windows operating systems. It provides an extensive scripting language and can be used to automate administrative tasks and system configuration.
While Cmd(Command Prompt) and PowerShell are both command-line interfaces used in Windows operating systems. There are some key differences between the two:
While these CLI tools have different names and are used on different operating systems, they all provide similar functionality in terms of allowing users to enter commands to interact with the operating system and perform various tasks.
An interesting practical example to see the similarity and differences between these popular CLIs is the command to change the encoding of a file to ‘UTF-8’.
In Bash (on Linux or Unix-based systems) the command is iconv and has following syntax:
iconv -f [source_encoding] -t UTF-8 [input_file] > [output_file]
For example, to convert a file encoded in ISO-8859-1 to UTF-8 using Bash:
iconv -f ISO-8859-1 -t UTF-8 input.txt > output.txt
In Terminal (on macOS) the name of command is same but syntax is slightly different:
iconv -f [source_encoding] -t UTF-8 -o [output_file] [input_file]
For example, to convert a file encoded in ISO-8859-1 to UTF-8 using MacOS Terminal:
iconv -f ISO-8859-1 -t UTF-8 -o output.txt input.txt
On Command Prompt (on Windows) the command is ‘chcp’ and its syntax is:
chcp [code_page_number] & type [input_file] > [output_file]
For example, to convert a file encoded in ANSI (Windows-1252) to UTF-8 the command is:
chcp 1252 & type input.txt > output.txt
Power Shell (on Windows):
Get-Content -Path [input_file] -Encoding [source_encoding] | Set-Content -Path [output_file] -Encoding UTF8
For example, to convert a file encoded in ANSI (Windows-1252) to UTF-8 in Power Shell the command is:
Get-Content -Path input.txt -Encoding Default | Set-Content -Path output.txt -Encoding UTF8
The Goodness-of-Fit (GOF) test is a statistical technique used to assess whether a sample of data comes from a specific probability distribution or not. In simpler terms, it is a way to check if the data you have collected fits a certain pattern that you expected or assumed.
For example, let’s say we want quality control at a candy factory, and want to make sure that the distribution of colors in a bag of candies matches the expected distribution. We expect the candies to be equally distributed among four colors: red, green, blue, and yellow. However, when we sample a bag of candies, you find that there are 60 red, 30 green, 5 blue, and 5 yellow candies.
To check whether this distribution fits our expected distribution, we can perform a GOF test. We start by calculating the expected frequency of each color if the candies were evenly distributed:
Expected frequency = Total number of candies / Number of colors
Expected frequency = (60 + 30 + 5 + 5) / 4 = 25
Next, we can use a statistical test, such as the chi-squared test, to calculate a p-value that indicates the probability of observing a distribution as different from the expected one, given that the expected distribution is true. In this case, if we perform the GOF test and find a p-value less than 0.05, we can conclude that the distribution of colors in the bag of candies is significantly different from what you expected.
To perform a GOF test in Python on this candy example, we can use the SciPy library, which contains statistical functions for hypothesis testing, including the chi-square test for GOF. We first define the observed values as the frequency of each color in the bag of candies. We also define the expected values as an equal distribution among the four colors. Next, we perform the chi-squared GOF test using the chisquare function from the scipy.stats module, which takes as input the observed values and the expected values. This function returns the chi-squared statistic and the associated p-value. Finally, we print the results and check the p-value to determine whether the observed distribution of colors fits the expected distribution. In this case, since the p-value is less than 0.05, we can conclude that the distribution of colors in the bag of candies is significantly different from what we expected.
Python code for GOF test:
import numpy as np
from scipy.stats import chisquare

# Define the observed values
observed_values = np.array([60, 30, 5, 5])

# Define the expected values (assuming an equal distribution)
expected_values = np.array([25, 25, 25, 25])

# Perform the chi-squared GOF test
statistic, p_value = chisquare(observed_values, f_exp=expected_values)

# Print the results
print("Chi-squared statistic:", statistic)
print("P-value:", p_value)
if p_value < 0.05:
    print("The distribution does not fit the expected distribution.")
else:
    print("The distribution fits the expected distribution.")